
Before You Start
Connecting a Payee Profile is available through three methods:
- CSV file upload
- Connect Supplier UI (single connection)
- Profile Manager (new — connect directly from the profile)
This article covers the new Profile Manager method.
Note: This option is only available to users with the Upload Data permission. If you don't see a Connect button on an approved profile, contact your organization's PaymentWorks administrator to request this permission.
Step-by-Step Instructions
- In the Profile Manager, click the approved Payee Profile you want to connect.
- Scroll to the bottom of the profile to find the connection bar. If the profile is eligible to connect, the Connect button will be clickable. Click Connect.
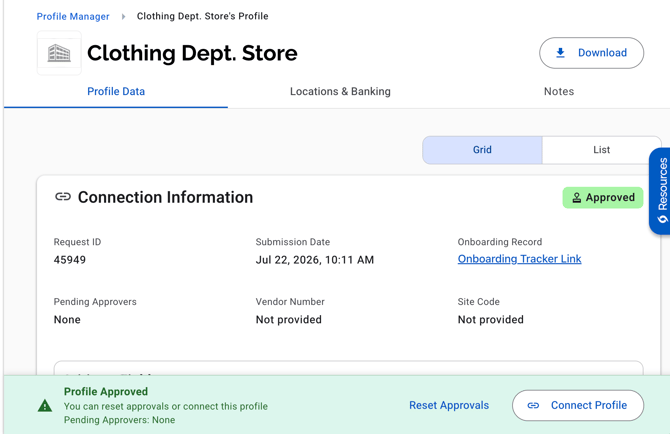
- In the pop-up window, locate the address you're connecting, then enter the Vendor Number and Site Code.
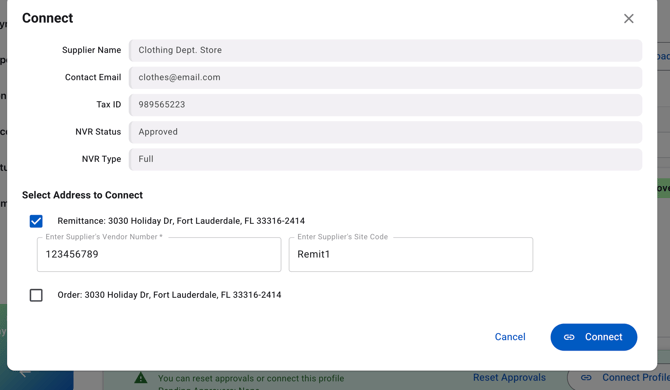
- Click Connect to complete the connection.
Once connected, the Payee Profile status will update to reflect the new connection.
Important Notes- The Connect button only appears on profiles with an approved status.
- Only users with the Upload Data permission can see and use this button.
- This method does not replace the CSV upload or Connect Supplier UI options — it's an additional, faster way to connect a single profile without leaving the Profile Manager.
- Double-check that the Vendor Number and Site Code match your ERP records exactly to avoid connection errors.
- Connect Supplier User Interface (UI)
- What Is A Vendor Number, And How Do I Find It?
- Troubleshooting Vendor Connection Issues
- How to Access and Review Payee Profiles
Still have questions? Contact Support.